|
|
According to the Scheduled Maintenance Guide that came with my Ford F350 7.3L Diesel:
"Rear axles and power take off (PTO) units
containing synthetic lubricant and light duty trucks equipped with Ford-design axles are lubricated for life. These lubricants are not
to be checked or changed unless a leak is suspected, service is required or the axle assembly has been submerged in water"
HUH???
I certainly don't agree with the owner's manual so at 62,000 miles it's getting a fluid change.
I decided to document this maintenance for anyone that has not tackled this job before. The procedure is very straight-forward and
only requires the regular hand tools found in your toolbox. Pull the cover, drain the fluid, re-install the cover and re-fill. The only thing
about the Sterling 10.5 is that is has NO gasket. Silicone must be applied to the mating surfaces and allowed to partially cure
before re-filling the differential housing. My differential cover was beginning to show signs of rust, so I decided to do something
about that while I had it apart - powdercoat it!
Got a question? Contact me on my DieselOrings.com webshop CONTACT PAGE
|
Here it isThe Ford Sterling 10.5 will require 6.9 pints (3 1/2 quarts) of synthetic 75W-140 gear oil and if yours is a
limited slip differential,
pickup 4 oz of Ford's XL-3 Friction Modifier. Make sure you have a tube of high temperature silicone gasket maker, emery
cloth, cleaning solvent and a can of Rustoleum paint.
Before parking the truck in the spot you are going to do the job at, run it around awhile to get the fluid warm
- 15 minutes or so.
By warming up the oil, it will drain out of the housing much quicker and will flush out the metal particles suspended in the fluid.
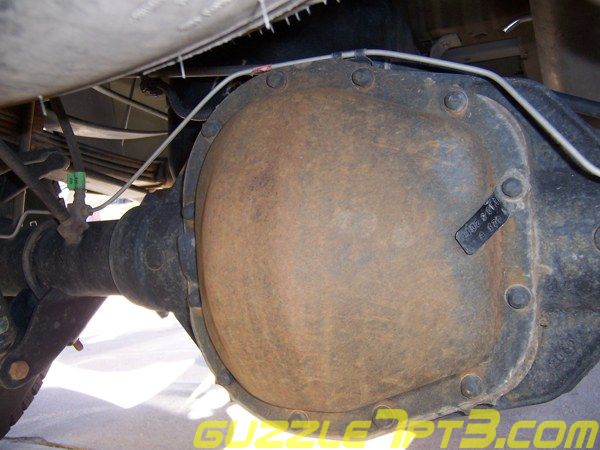
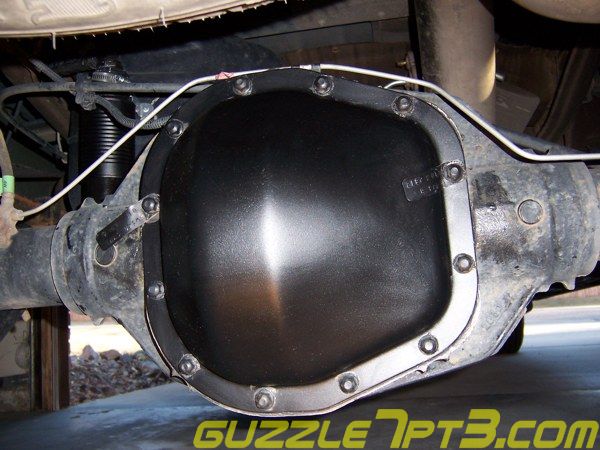
This is the axle housing I was looking at. Some what intimidating when you first crawl under the truck
simply due to it's size. The 12 bolts around the housing must be removed with a 13mm or 1/2 inch socket. None of mine were
overly tight;
in fact two almost seemed as if they were not properly torqued at the factory with no bolt impression on the cover plate!
|
|
|
Drain the housing and clean the cover plateOnce you have loosened all 12 bolts, remove all but two. Leave two bolts
very loose at the top of the housing. When splitting the cover from the housing, the fluid will drain out the bottom into your drain pan
and the two remaining bolts will keep the cover from crashing down into your drain pan. Using a thin putty knife, tap it between
the cover and case near the bottom. Work the blade around the case and the cover will pop off. Be careful because once the cover
breaks loose, the fluid will gush out from the housing and will make quite a mess if you're not prepared. Once the fluid has slowed to
a trickle, remove
the two remaining bolts and wash differential the cover off in solvent while you allow the remaining fluid to drain from the case. Dry the cover off
and use emery cloth to remove the remaining silicone sealant from the inside mating surface.
|

|
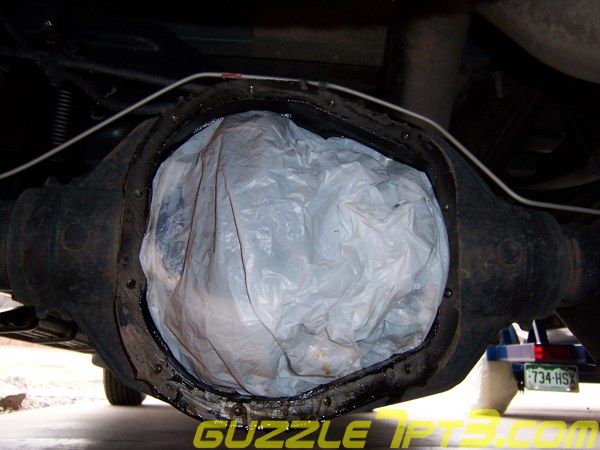
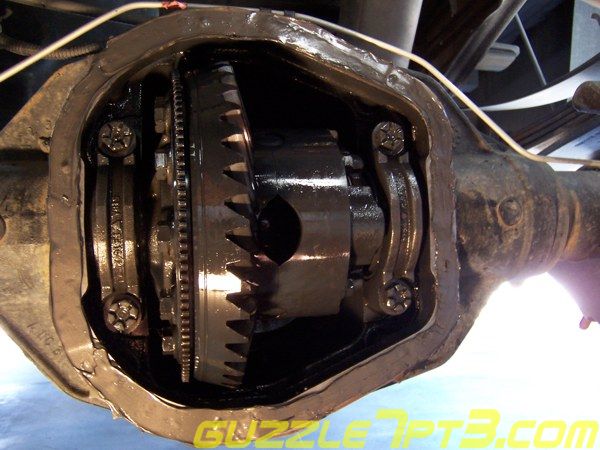
Prepare the differential for cleaningCover the differential gears with a plastic bag to keep out debris when cleaning
the case surface.
|
|
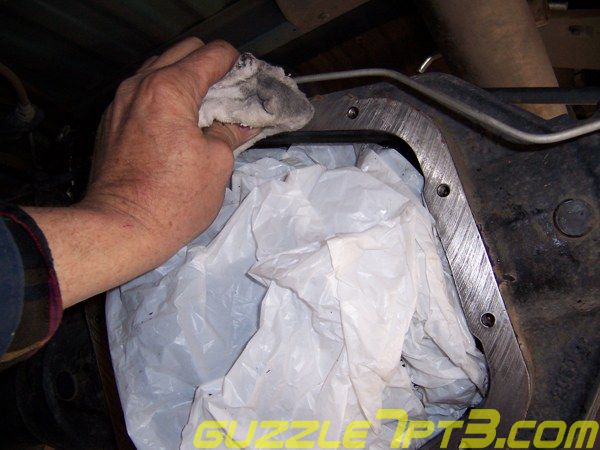
Clean the seal surfaceUsing the putty knife you used to split the cover, scrape as much of the remaining silicone off of the case mating
surface as you can. Follow this up with emery cloth to remove the remaining silicone.
|

|
Finish by wiping down with solventAfter thoroughly scraping and cleaning the surfaces, use a good solvent to wipe
off any remaining grease and dirt. It is necessary to have a very clean and dry surface for the new sealant to adhere to. Wipe down
both the differential case and cover surfaces. I use lacquer thinner.
|
|
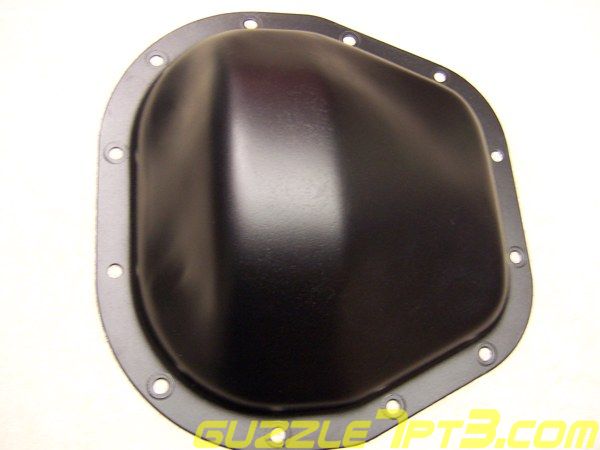
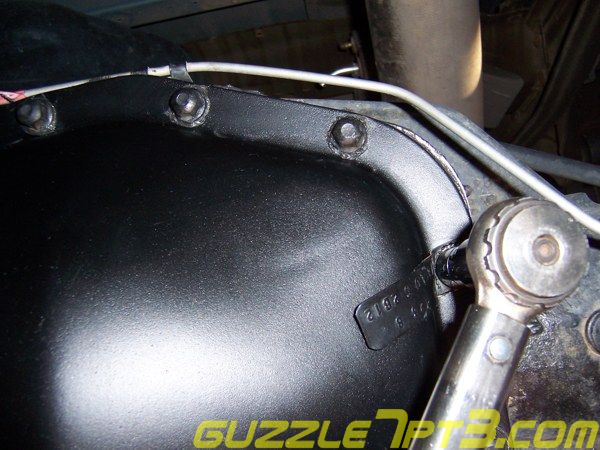
Clean the outer coverIf you drive in areas that use salts and other corrosive chemicals, it is imperative that you
keep the outer cover in good condition. There have been numerous reports where owners have neglected these covers to the
point that they will begin leaking through holes that have rusted through the cover plate! You can brush it down and give it a few
coats of Rustoleum paint which should hold up for a while. I choose to sandblast and powdercoat the cover.
|
|
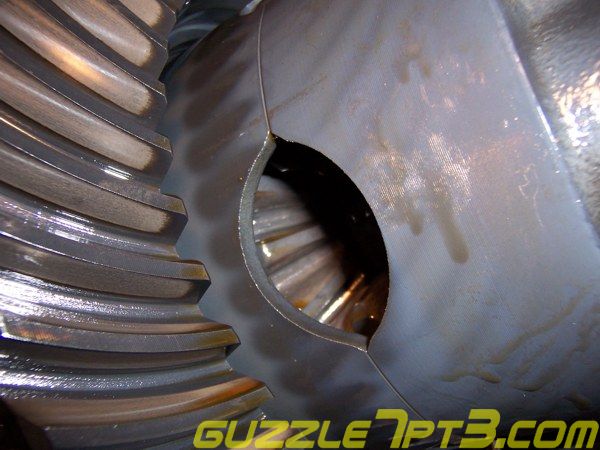
Inspect the Ring GearRemove the plastic bag from the gear assembly being careful not to drop any silicone that
may be on the bag, into the differential housing.
Take a close look at the ring gear for deep or unusual wear from the pinion gear. Deep grooves, scaring or chips are a sign of
impending problems.
|
|
New silicone sealantLay a good bead of RTV silicon around the differential case's surface. Let the silicone 'skin'
over before applying the cover for about 20 minutes. Here I have used Permatex Black RTV sealant and went a little overboard.
All you need is a bead 1/8 to 1/4inch wide. When laying a single bead, circle around the bolt holes so it will completely seal at
those points.
|
|
Set the cover plateCarefully position the coverplate on the case and hand screw all 12 bolts into the case. Snug
up with a 3/8 socket wrench.
|
|
Torque the cover boltsTorque the differential cover bolts down 29-39 lbs-ft. I torqued all the bolts in a star pattern to 33 lbs-ft
and then again at 36 lbs-ft. Ford recommends waiting 1 hour before adding new fluid. It was getting late at this point, so I rolled the
truck out of the shop and let it sit overnight.
|
|
Refill the housingRemove the 3/8 drive fill plug on the front drivers side of the differential housing. Ford specifies
75W-140 SYNTHETIC ONLY for the Sterling 10.5 differential along with 4 oz of XL-3 modifier if it is a limited slip. Many of the
better synthetics have limited slip modifiers in their blend already and if you add the Ford modifier to them, you end up with a
limited GRIP differential. I recommend just filling to the bottom of the plug hole and do not add any modifier yet. Drive around a
while and try some tight turns. If you notice
some 'scuffing' from the rear wheels, add 2 oz of Ford's modifier and drive it again. If it is still chattering on corners, add the remaining
2 oz. Once you no longer notice the rear tires trying to grip in tight turns, you've added the proper amount of modifier to the fluid
you have used.
|
|
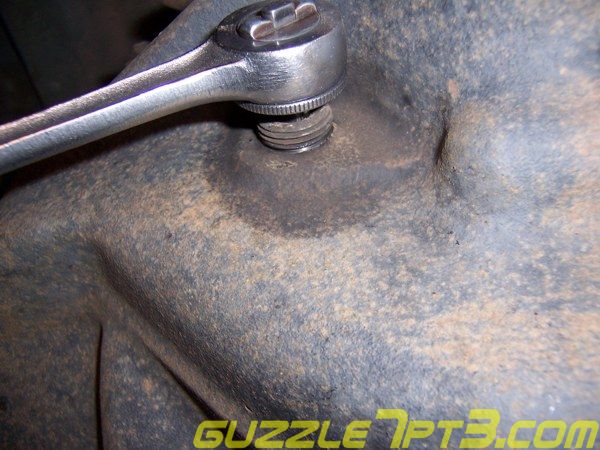
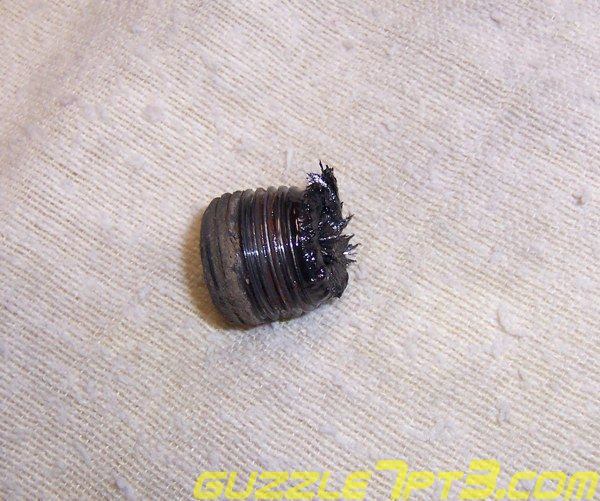
Clean and Replace the fill plugThe fill plug is a magnetic plug and will collect particles from the manufacturing of the
housing along with wear filings. Just wipe this off with a rag and use Teflon tape or a liquid thread sealant on the threads. Replace the
3/8" drive plug in the differential case. Tighten to 15-30 lbs-ft. That's it, fluid change is complete.
|
|
Dana 60 Front Differential Fluid Change
|
Back to guzzle's Powerstroke Maintenance Index |