|
|
Searching through my Scheduled Maintenance Guide that came with my truck, I did not see any mention of changing the
front axle fluid until 150,000 miles. Since I had already ignored Ford's advice of NEVER changing the rear axle fluid, I figured 'Why
stop now' and picked up 3 quarts of 75W-90 full synthetic axle grease. There were signs of seepage on the front cover and that
needed to be addressed also. Like the rear cover, the front differential cover was beginning to show signs of rust so it got the
powdercoat treatment too!
Got a question? Contact me on my DieselOrings.com webshop CONTACT PAGE
|
Where to start?Before parking the truck, run it around awhile to get the fluid warm. 15 minutes around town should
do it, just remember to engage the 4x4 to get everything spinning in the axle. Warming will assist in
draining out of the housing faster and will flush out the metal particles suspended in the fluid.
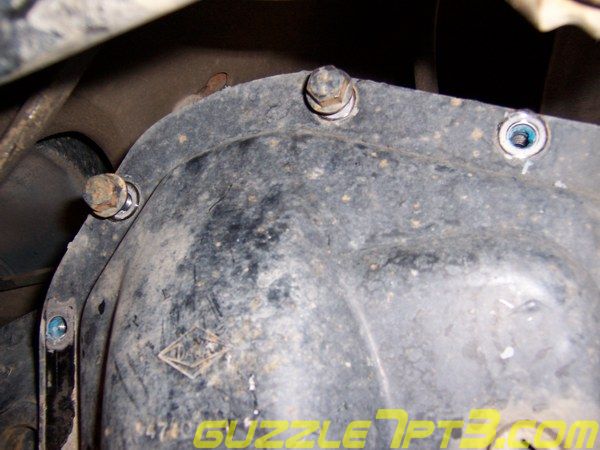
This is the axle housing as seen from the front of the truck. I could tell this was going to be a little more difficult than the rear due to
room restrictions imposed by steering linkage and engine frame cross member.
|
|

|
Drain the housing and clean the cover plateRemove the cover bolts with a 9/16" socket. Leave two bolts at the top
with just a few threads screwed into the housing.
By leaving the two bolts in, when splitting the cover from the housing, the fluid will drain out the bottom into your drain pan and the
cover will remain hanging on the case.
|
">
|
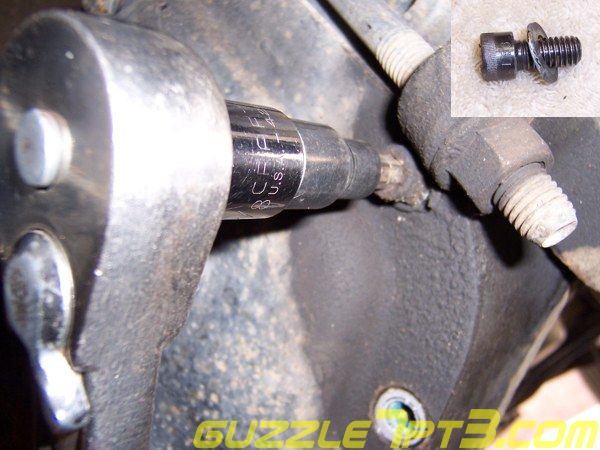
The oddball in the groupThere is one bolt on the cover, next to the spring shackle, that requires removal with a 5/16"
Allen wrench. I found that it was much easier to remove this with an Allen socket that I had in the toolbox. This bolt is the only one
in the cover that has a washer, be careful not to drop and loose it.
|
">
|
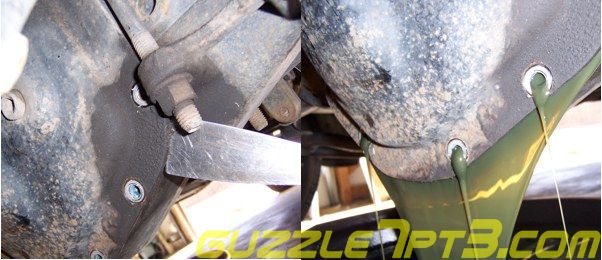
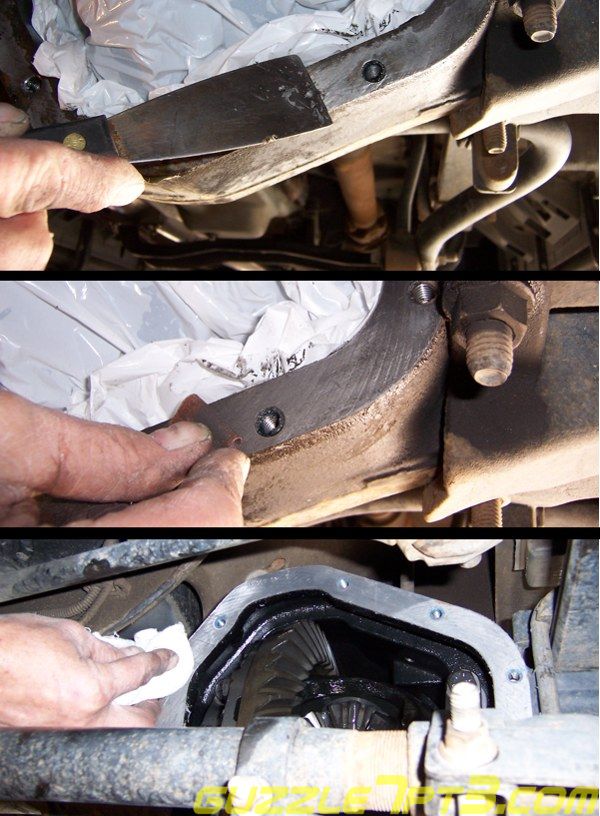
Split the caseWith a thin putty knife, tap it in with a hammer between the cover and the plate. Work your way
around the bottom and sides until the cover pops loose. Make sure your drain pan is positioned under the differential at this point.
|
">
|
Clean the coverRemove the last two bolts and remove the cover. While the housing is draining, wash the cover in
solvent. With the putty knife you used to split the case, remove as much of the old silicone sealant as you can.
|

|
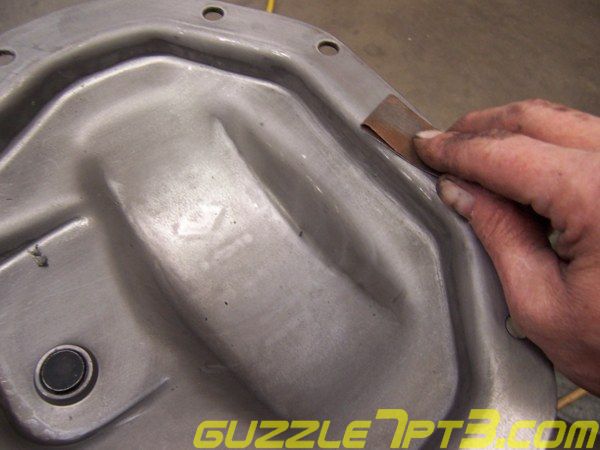
To remove the last of the silicone and any corrosion you may find on the sealing surface, use a piece of Emery cloth and buff
down the cover's mating surface.
|
">
|
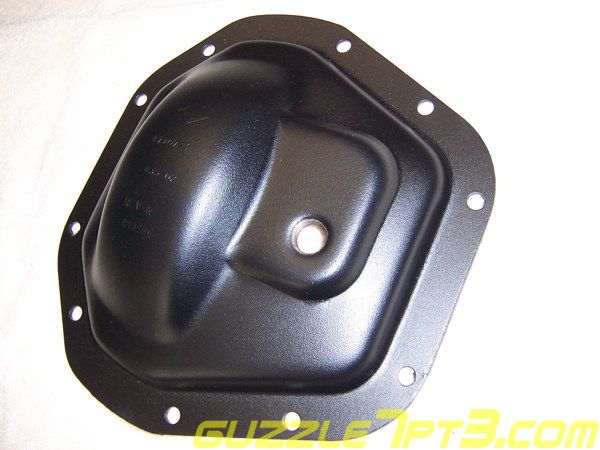
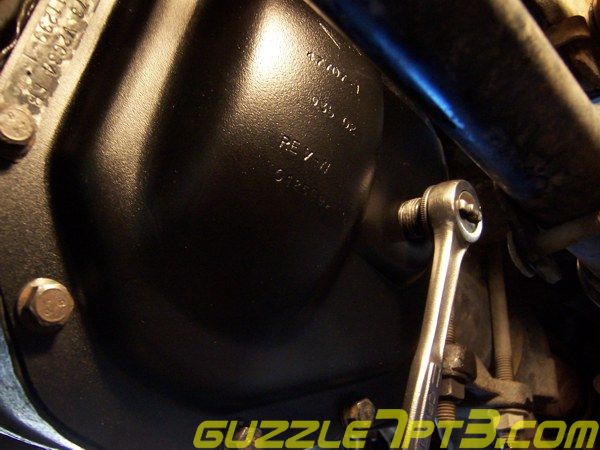
Protect the coverCorrosion and rust pitting can cause the differential cover to begin leaking. Now would be a good
time to put a new coat of paint on the cover. You can wire brush the rusty areas, sand and recoat with some Rustoleum protective
paint or sandblast and powdercoat it as I did.
|
">
|
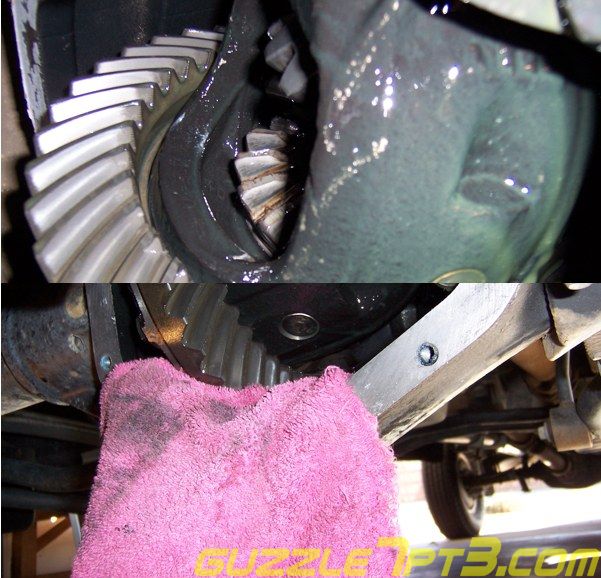
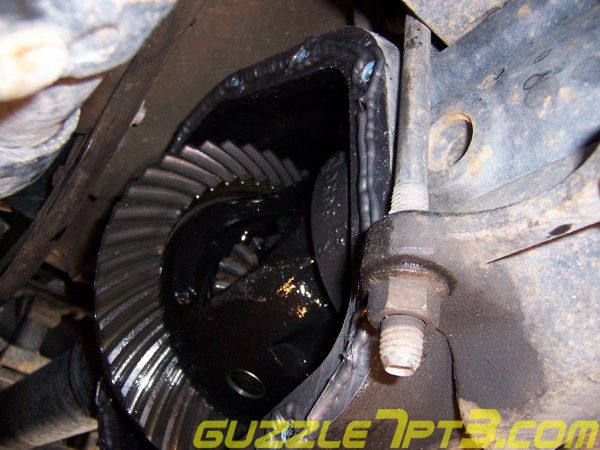
Inspect the differentialTake a close look at the wear pattern on the ring gear. Look for any signs of damage or
cracks. With a clean rag, try to dip out as much remaining fluid from the bottom of the case so it will not be dripping out when you
apply new sealant.
|
">
|
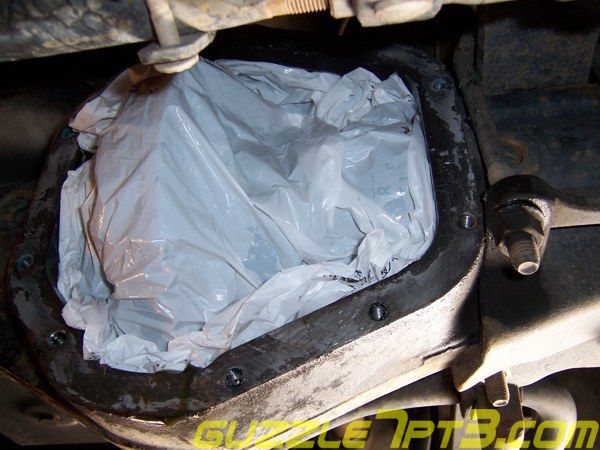
Prepare the differential for cleaningCover the differential gears with a plastic bag to keep out debris when cleaning
the case surface.
|
">
|
Clean the seal surfaceUse the putty knife to scrape most of the silicone off, Emery cloth to remove the remaining
silicone and any corrosion. Finish by using a good solvent to wipe off any remaining grease and dirt. It is necessary to have a very
clean and dry surface for the new sealant to adhere to. Wipe down both the case and cover surfaces. I use lacquer thinner.
|
">
|
New silicone sealantLay a good bead of Hi-Temp RTV silicone around the differential case's surface. Ford's
recommendations are a 1/8" to 1/4" bead. Run the bead around all bolt hole to prevent seepage here. Let the silicone 'skin'
over before applying the cover for about 20 minutes. I used the Permatex Black Hi-Temp RTV sealant.
|
">
|
Install the coverCarefully position the cover over the housing and install all of the bolts. Torque to 35 ft-lbs. Allow
the silicone to dry a minimum of 1 hour before refilling the housing with fluid
|
">

|
Refill the gear oilFill the differential with 5.7 pints of 75W-90 gear oil. Ford does not specify regular or synthetic
but I would suggest that you purchase a high quality synthetic gear oil for the Dana 60. 5.7 pints will bring the level to the bottom
of the threads of the fill hole. Apply a thread sealant to the plug and tighten to 20 ft-lbs. Drive the vehicle for 15 minutes and check
for leaks.
|
">
|
|
Sterling 10.5 Rear Differential Fluid Change
|
Back to guzzle's Powerstroke Maintenance Index
|