|
|
|
Here is another basic maintenance procedure that is fairly straightforward, easy to do and can save you $$$ over
taking it in to a dealer to have this done.
The recommended interval to change the fuel filter is between 10,000 and 15,000 miles.
Got a question? Contact me on my DieselOrings.com webshop CONTACT PAGE
|
|
Parts and supplies to change the engine fuel filter |
|
Fuel Filter |
-
Racor PFF459, Motorcraft FD4596 or Napa Gold 3518, |
Shop rags |
[Click on a thumbnail to see a larger image - -
javascript must be enabled and popups allowed from this site]
|
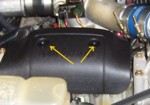 |
First, remove the plastic engine cover by unscrewing the two cap nuts. This will expose the fuel filter bowl that sits directly
in the center of the engine valley.
|
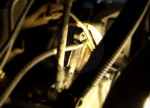 |
Locate the fuel drain tube that leads from the rear of the fuel bowl on the top of the engine and
terminates under the passenger's side cylinder head, on the front of the engine. It is a 3/8" stainless steel tube tucked
close to the engine, directly over the front axle. Slip a short length of 3/8" hose over the drain tube and route it to a container
on the floor, under the engine. This will catch the fuel that will be drained from the fuel bowl during this service and keep from making
a mess on your shop floor.
|
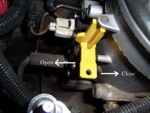 |
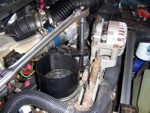
Rotate the yellow drain valve clockwise, 90 degrees and completely drain the filter bowl empty.
Take a close look at this valve as it is
a common place to find fuel leaks. Leakage seems to have increased considerably with ULSD Fuel (Ultra Low Sulfer Diesel). We have genuine
Viton replacement fuel drain o-rings at our webshop -
DieselOrings.com. There are free downloadable instructions on the site for the replacement of these o-rings also.
|
 |
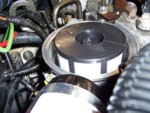
Do not close the yellow valve yet. Remove the fuel filter cap with a large oil filter wrench (that same size that you remove your
oil filter with works here). You can also use a pair of pliers by placing the jaws into the top of the lid and using a large screwdriver to
twist the cap off. Be careful with this method as it is easy to break one of the ribs on the filter lid used here.
|
 |
Carefully remove the cap which should expose the old filter element.
NOTE: Some aftermarket
fuel filters have the element permanently affixed to the filter. If this is the type of element you have, stop now and make sure you
have a separate fuel bowl lid to re-install with your new filter.
|
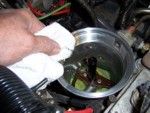 |
Gently remove the filter from the bowl. There will be a small amount of fuel trapped inside the filter that will be released when
it clears the center post of the bowl. allow this fuel to drain out. Pour a small amount of clean fuel in the bowl to flush out any
sediment that may be left in the bottom of the fuel bowl. Use a clean rag to clean the seal surface at the top of the bowl.
|
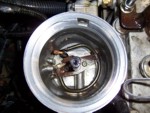 |
Take a good look down inside the fuel bowl, checking to see if someone has left an o-ring from a previous filter change. Also
check for dirt or sediment on the bottom. It may require the use of a Q-tip to scrub the sediment loose. Flush the bowl again.
Make sure the heater element mountings are tight and there is no damage to the element itself. Now it is time to close the drain valve.
|
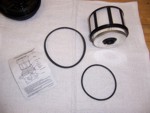 |
Inspect the contents of your new fuel filter. It should have the element and two gaskets - one round and one tapered.
|
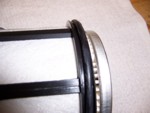 |
Place the o-ring gasket in the groove at the bottom of the new filter element. |
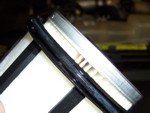 |
Coat the o-ring with clean fuel and place it back in the filter bowl - o-ring down. |
 |
Press the filter down as far as you can into the bowl, it will still be above the top lip. |
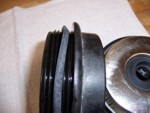 |
This is the only tricky part of the entire service. Many leaking fuel filter changes can be attributed to simply putting this
gasket on THE WRONG DIRECTION! The bevel needs to be towards the lid, not the bowl. Coat the gasket with clean fuel,
place it on top of the bowl or slip it over the lid, JUST MAKE SURE IT"S GOING THIS DIRECTION. |
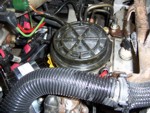 |
Snug the fuel lid down on the gasket, do not overtighten. Turn the key to the 'ON' position without cranking the engine. Check the fuel bowl
for leaks; check the drain tube under the truck for leaks. |
Turn the key off and then back to 'ON' until the pump stops and you can
no longer hear the familiar 'buzz' from under the driver's seat. Do this a total of three times and give both the fuel bowl and drain tube
one more check for leaks.
Disconnect the hose that you slipped over the drain tube and start the truck.
Check for leaks one final time before closing the hood.
|
Back to guzzle's Powerstroke Maintenance Index |
