|
|
|
[Click on a thumbnail to see a larger image - - javascript
must be enabled and popups allowed from this site]
|
|
Required Parts

|
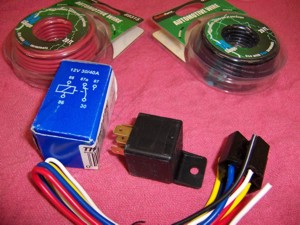
Parts that you will need - if you purchased a light kit, many of these parts will be included in the kit.
Automotive Relay - SPDT with wiring harnessSPDT 3-Position switch - ON-OFF-ON; toggle or rocker type20 amp Automotive fuse, circuit breaker or fusible linkstranded copper wire; #12 and #14 guageMiscellaneous wire connectors; crimp-on or solder
|
I know most of you are like me and can't leave well enough alone. There is always room for improvement right?
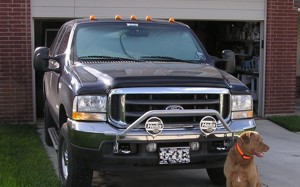
I added a set of driving lights to my tow rig, but I did not want to control them in the conventional manner. I wanted options.
Normal driving lights are wired to come on with your high beams, which is great, but what if you wanted them on with your Low Beams?
Well you can wire them accordingly, but you're still stuck with them on your low beams or "OFF".
My reasoning behind all this came from my last trip home to CO. When I was driving up thru Fredericksburg and the hill-country at 3am,
I realized I couldn't see far enough to watch for deer and there were a lot of 'em. Having an option to switch them on with the high beams also
allows me not to have to lean forward to flick a switch every time I wanted them on or off. I also wanted the options to control the lights because
I can "tune" my light output better according to the weather. Maybe the driving lights would be too much for light fog, so I can turn them off and
just use the factory high beams. Maybe it's dusk or dawn and I don't need all my headlights on, so just the driving lights illuminating the shadows
and glowing eyes is sufficient. I haven't had the opportunity to test my new setup much, but I do look forward to making that trip to CO again
knowing I'll have a fighting chance against not adding to the menu at the road kill cafe.
You can have your cake and eat it too.
You can wire them in such a way that you have control whether you want them to come on with the high beams or come on with the key,
with just a flick of a switch. How? Glad you asked. It's quite simple really. Usually your lights will come with a lot of wire, a relay,
a switch, a fuse and other misc. junk. Most of this will be used.
|

|
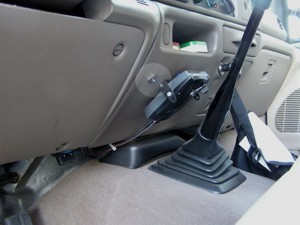
Before install you need to go to your favorite electrical supplier
and get a 12V on-off-on SPDT switch. I found the one I wanted at Home Depot because it had spade connections,
but I also saw some with solder connections. If you want to get fancy, you can find a lighted one, but that is an extra wire to run.
|
Installation
|

|
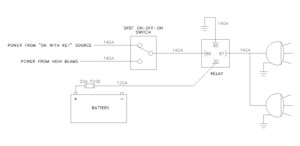
Basically you'll be using this switch to tell the relay which power source will power the driving lights. One leg of the switch will
be wired to your High Beams, and the other leg will be wired to something that gets power when you turn the key on.
Finally the third leg will be wired back to the relay. I wired the "on with key" leg to my radio power, but there are many other places to draw power.
The "OFF" position remains "OFF" so there should be no surprises there. You'll notice a lot of similarities from my schematic to the
schematic provided with your lights. Grounding is critical. Make sure you have a good ground. When I have had problems with auxiliary lighting,
90% of the time it's due to bad grounding.
Mount the relay in the engine compartment close to the battery. The shorter the run is to the auxiliary lights, the less the voltage drop will be across the 12 gauge wire.
Install a 20 amp fuse, circuit breaker or fusible link as close to the battery connection as possible on the wire going to pin 30 of the Relay. If there is a short in the circuit or the wire
gets chaffed some time in the future, this will protect the high current wire that supplies the 12 volts to the lights.
|
|
Back to guzzle's Powerstroke Modification Index |
|


