|
|
After reading many posts about the front brake calipers slide
pins corroding and freezing in the pin bores on the Ford 7.3L Powerstroke Diesel trucks
I was getting a little paranoid about the possibility of having
brake failure or expensive caliper/rotor repairs due to the
original slide pin design. Ford has a slide pin upgrade kit
(2C3Z-2C150-AA) available for about $20 and since I was planning to
do a little front axle maintenance anyway, I decided to tackle this
job.
As an added bonus, the pulsation I have been feeling when coming to
a stop, like the brakes were quickly grabbing and releasing, is somewhat reduced.
I still believe that the factory rotors are warped and replacement rotors
will be one of my next projects. This job is surprising easy to do.
Got a question? Contact me on my DieselOrings.com webshop CONTACT PAGE
|
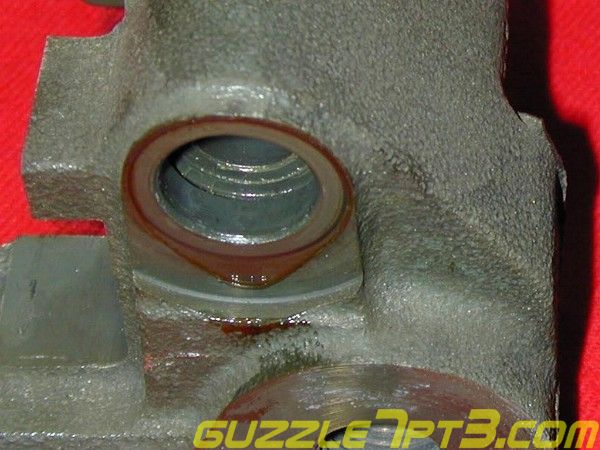
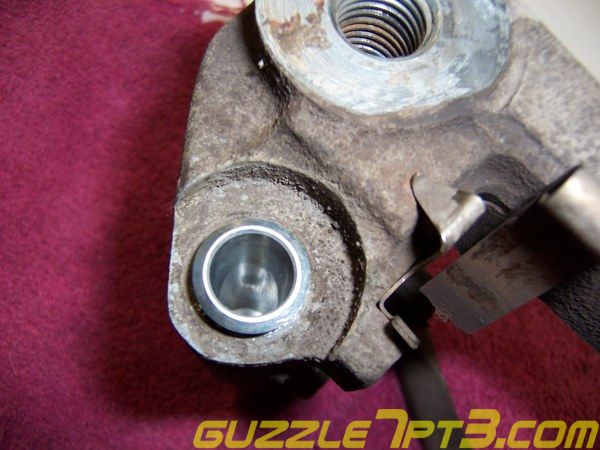
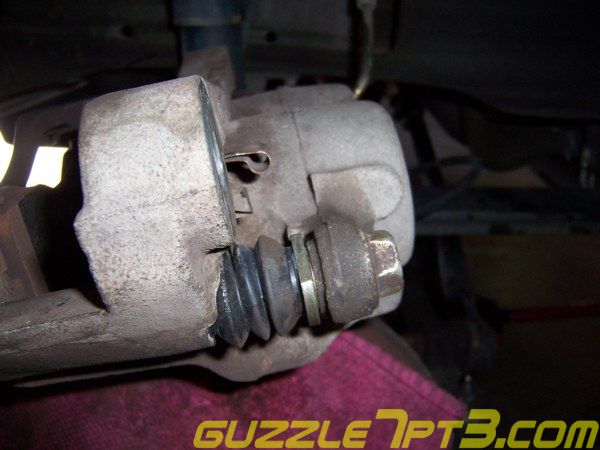
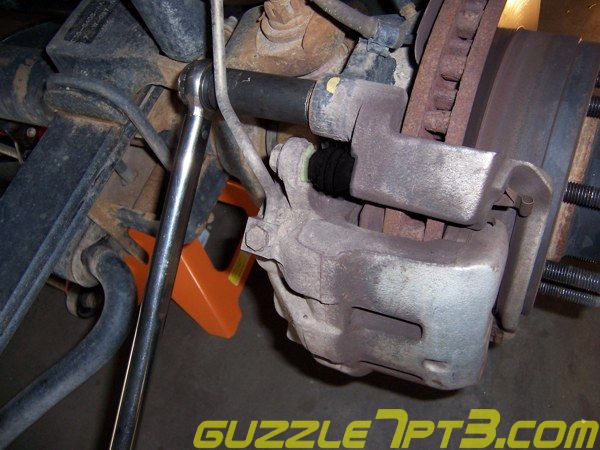
WARNING
Ford has 3 different styles of the front brake calipers. This
picture shows the caliper bore on the first generation caliper and
can usually be found on the 99 model Superduties. If your caliper
pin bore looks like this, the newer caliper pins described in this
article will not work. You will either have to upgrade your
calipers or use the older pin kit #YC3Z-2C150-AA
|
|
 |
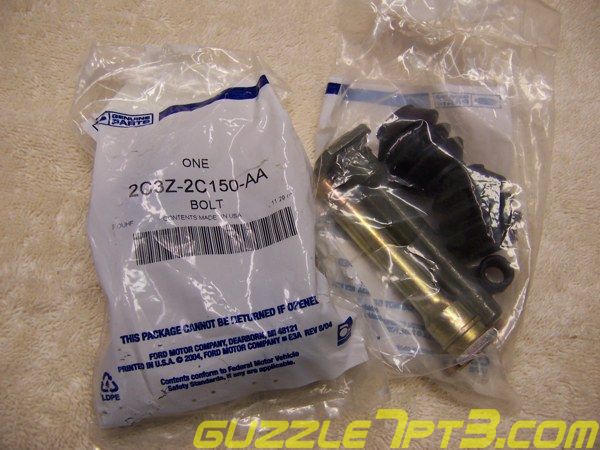
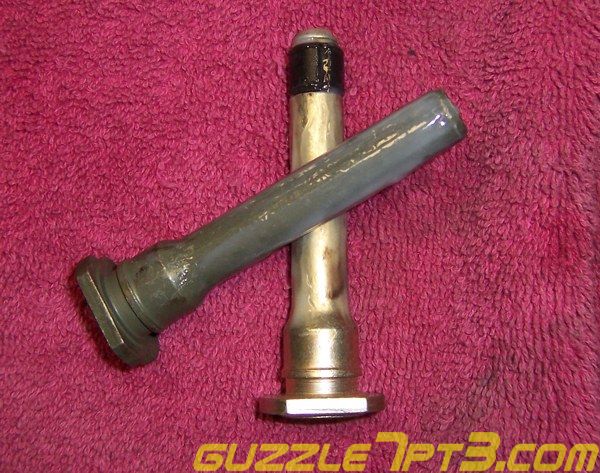
Upgraded pins
These are the parts you will need. Ford # 2C3Z-2C150-AA. Oneset per wheel will be needed.
|
 |
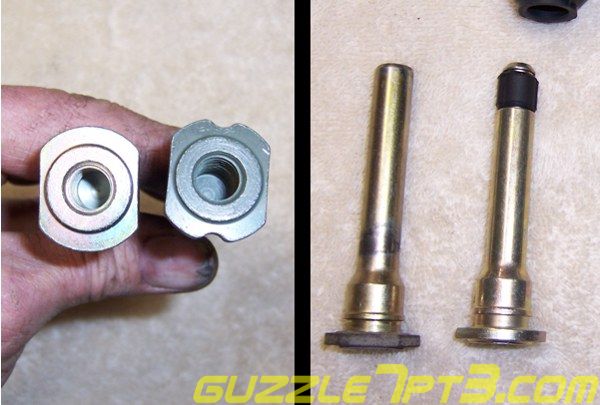
One pin in the kit looks identical to the original; the other
has a new rubber boot that is slipped over the bore end of the
slide pin. The kit also comes with new pin boots. Notice that the
two heads of the slide pins are a different shape and are the same
color and shape of the originals. You will want to replace the pins
in the same bores that the original came from.
|
 |
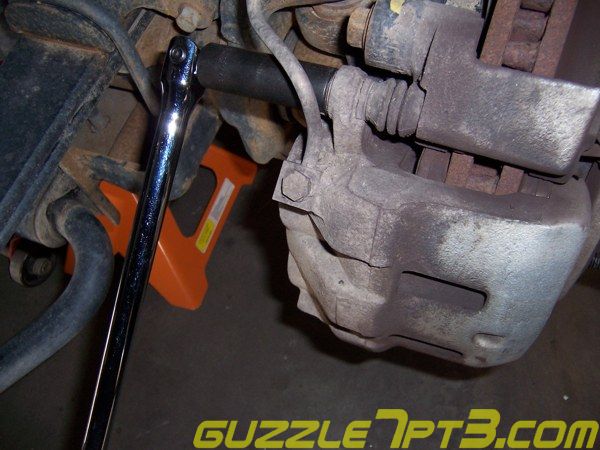
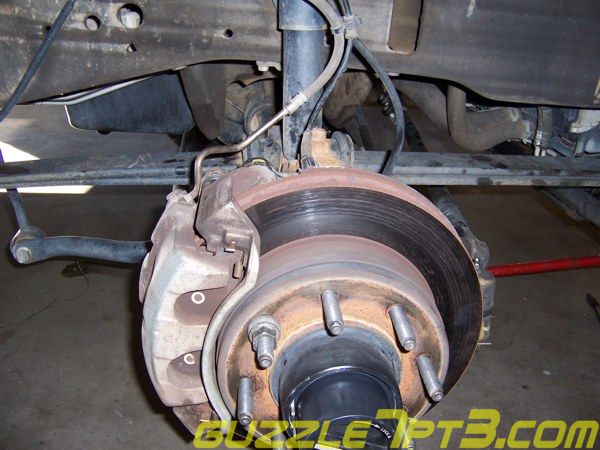
Removing the brake caliper
Park the truck in the work area and set the parking brake. Jack
the front end up and set the axle housing on a set of heavy jack
stands and remove the hubcaps and wheels. With a heavy breaker bar
and a 13/16" socket, break the two caliper mounting bolts
loose.
|
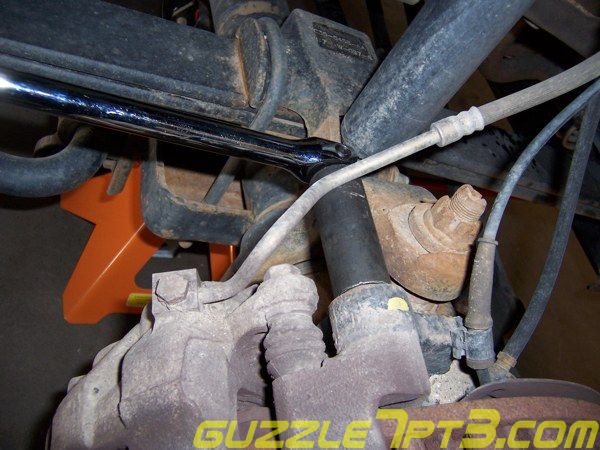 |
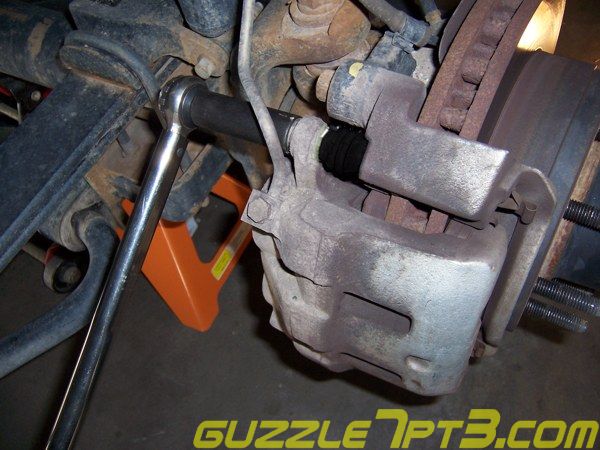
With the breaker bar and a 3/4" socket, break the caliper slide
pin bolts loose.
|
 |
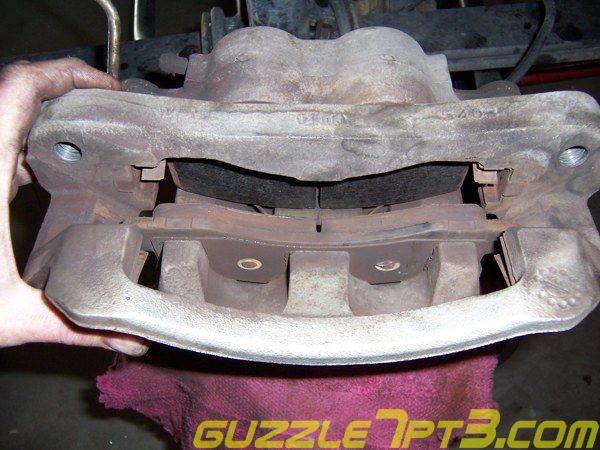
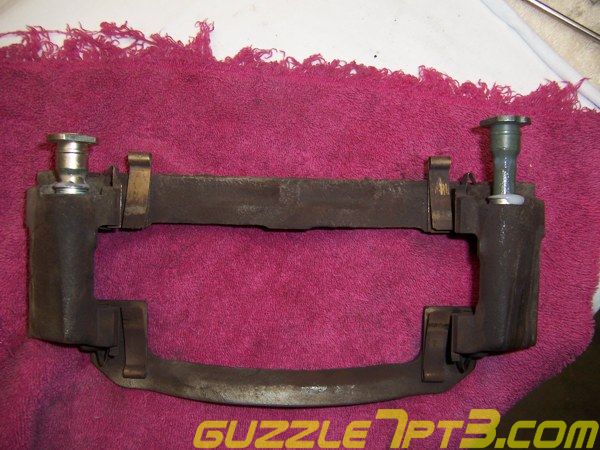
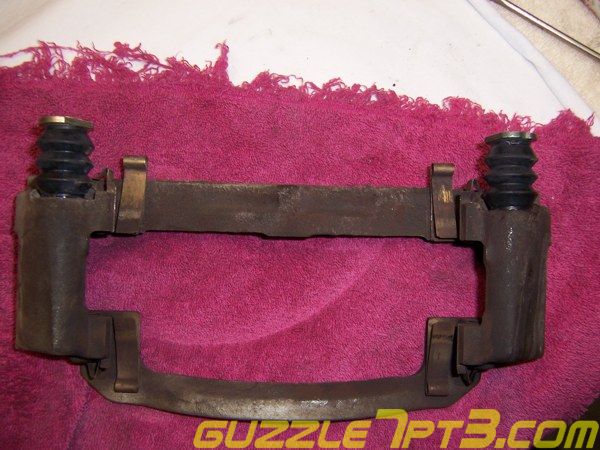
After removing the caliper mounting bolts sit the caliper on
the brake rotor and remove the two caliper slide pin bolts. With
the caliper in this position, slide the caliper slide pin bracket
towards you and it should easily slide off the brake pads and come
free.
|
 |
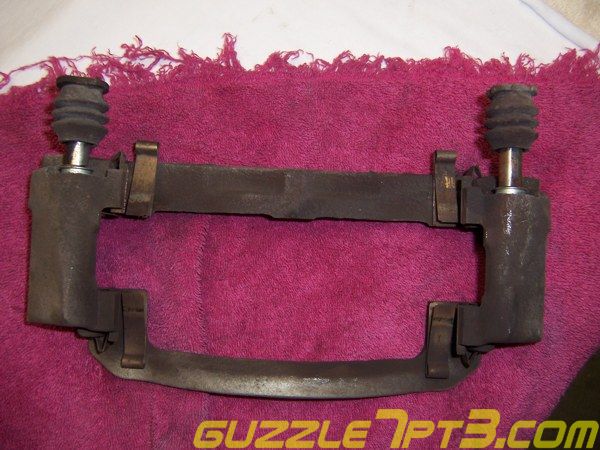
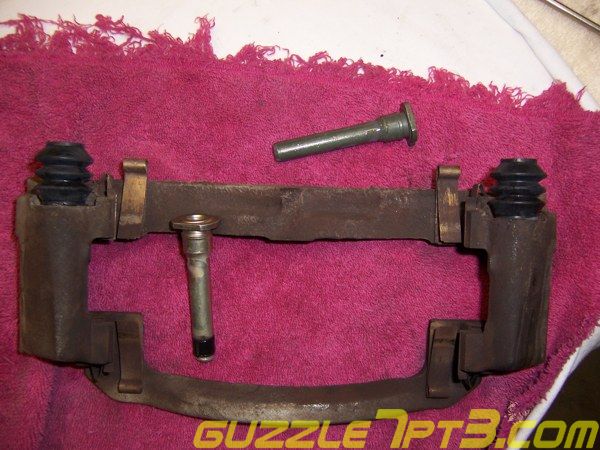
Set the bracket on the work area and pull the old boots and
slide pins from their respective bores. Pay close attention to
which colored pin comes from which bore. It may be helpful to mark
the bracket with one or two punch marks for the bore that holds the
green slide pin. The bores on my brackets were very dry but had not
yet started corroding.
|
 |
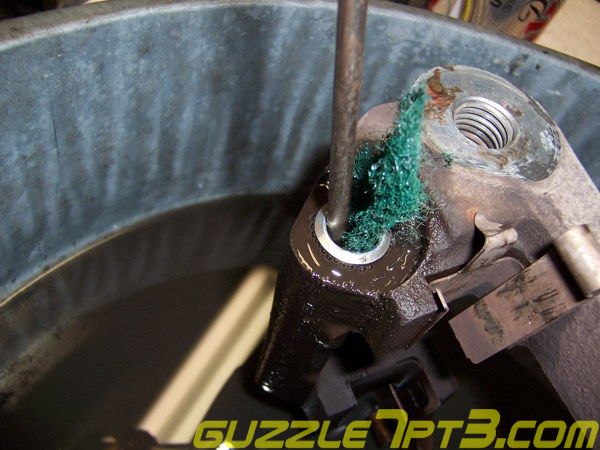
Clean out the slide pin bores in solvent. I used a screwdriver
with a small piece of ScotchBite pad wrapped around the tip as to
not scratch the interior of the slide pin bore. Using a 'butter
churn' action while turning the screwdriver did the job.
|
 |
If you have corrosion in your bores, you may want to try
wrapping some emery cloth around a wooden dowel and polish out the
bore holes or you could wrap some steel wool around a drill bit and spin it inside the bore until
the cylinder is rust-free..
|
 |
Coat the new slide pins with a Silicone Brake Lubricant. Don't
go too heavy as the bore opening will remove any excess. With
cotton swab, coat the interior of the bore with a VERY thin layer
of Silicone Brake Lubricant. If too much is put in the bore, when
the pin is inserted, the unit will hydro-lock and the caliper will
not be able to fully open. Do not attempt to use a product like a
anti-seize. These lubricants will not hold up to the heat that can be generated
by disk brakes and will eventually fail, causing catastrophic damage to the
calipers.
|
 |
Push the slide pins in the bores to every distribute the
lubricant and remove them.
|
 |
Install the new boots that came in the kit on the slide pin
shoulder flange.
|
 |
Install the slide pins into the new boots and down into the
bores. Make sure that the boots slip over the retaining ring at the
top of the slide pins.
The slide pin with the notch needs to be
installed in the bore that will be at the top of the caliper
(farthest from the ground) when the caliper is
installed.
|
 |
Reinstall the bracket on the caliper
Place the caliper in the same position as when you removed the
bracket. By positioning the bracket in this manner and sliding it
on, reversing the manner in which it was removed, the caliper will
go together. This procedure is more difficult than separating the
bracket from the caliper body and you will have to pinch the front
pad retaining springs closed to allow the retaining springs to
clear the tops of the front pads.
|
|
When positioning the slide pin heads in the caliper body, make
sure that the heads seat in the shoulder notch that is designed to
keep them from rotating. They should be flush with the body and not
sitting on top of the ridge. Install the pin bolts and lightly
cinch with a 3/4" socket.
|
 |
Install the caliper on the hub mount
Position the caliper back over the rotor assembly. To keep the
rotor in position if it comes loose, you can tighten one lug nut on
to the rotor. Line up the caliper bolt holes to the hub mounting
holes and install the mounting bolts.
|
 |
Torque the caliper slide pin bolts to 42 lbs-ft.
|
 |
Torque the caliper mounting bolts to 166 lbs-ft.
|
 |
Install the rims and tires on the hub and torque to 150-165
lb-ft. Reinstall the hub caps. Start the engine and pump the brake
pedal to fill the caliper pistons. Put the truck in gear and test
the brakes. Release the brake and slowly begin moving while tapping
the brakes to re-position the brake pads in the calipers. When the
brakes feel normal, take a test drive as listen for any unusual
sounds coming from the front wheels. All should be OK and you will
feel good knowing that you have a well functioning set of brake
calipers on your truck.
|
Now that you've gone this far, why not take 4 more nuts off and
lube those needle bearings? If you lose one of those because it's
dry, figure about $750 from the dealer, per side. This link will
take you to how I lubed my needle
bearings.
|
|
|
Back to guzzle's Powerstroke
Maintenance Index |


 [ 581KB ]